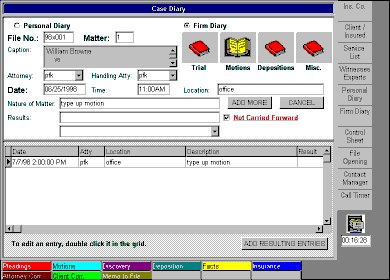
Diary records may be added or entered via the diary editing screen shown below. In this particular instance, we are going to enter a result for the entry displayed.
In order to close out a diary entry, two separate steps must be done. First, the entry must be given a result. Results may be selected from the Results pulldown, typed in manually, or formed from a combination of an entry from the pulldown and manually entered text. Next, the not carried forward flag must be turned off. If a result is entered without turning off this flag, the diary entry is still considered open.
For this entry, we will select a result of NEW DATE - SAME ENTRY from our pulldown list of results. Each entry in this list may be associated with an action by the system administrator. For this particular entry, the action to be performed consists of closing out the original entry and displaying a resulting entry form prefilled with our original entry without a date.
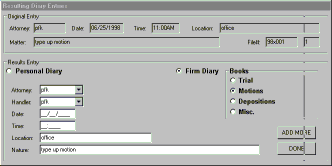
The first step gives us the chance to confirm that the original diary entry should in fact be closed.

Then, the prefilled results screen is displayed so that we may enter the new date and time for our resulting entry.
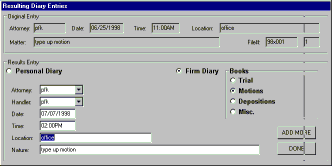
Now we can fill in the date and time for our new entry and save it by pressing the DONE button.
The edit screen now shows our original entry as closed with the resulting entry beneath it. By closing out our diary entries in this manner, we can form a timeline of events within the diary.
